
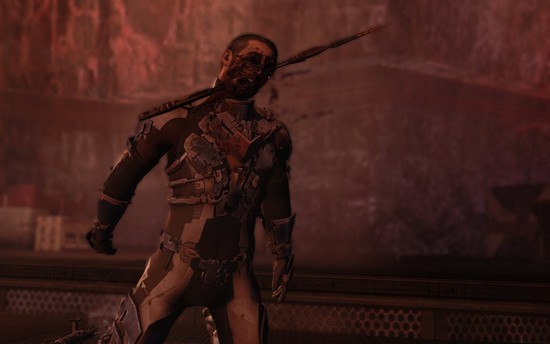
What is Dead Space 2?
The game begins in a hospital on the Sprawl, a densely populated metropolis built on a shard of Titan, one of Saturn’s moons. Isaac Clarke has no memory of the last three years, having just been released by Franco, the protagonist of Dead Space Ignition. However, before he can remove the straitjacket, Franco is killed and transformed into a necromorph, leaving Isaac to escape on his own. He is later contacted by a woman named Daina, who guides him to her location. He is also contacted by another patient, Nolan Stross, claiming he and Isaac can destroy the Marker. Ignoring Stross, Isaac fights his way across the city, making his way to Daina. Upon his arrival, two guards seize Isaac as Daina reveals that she is a Unitologist sent to “recover” Isaac, claiming that he is responsible for building the Marker that is causing the current infestation and that they need him to build more. As they are about to leave, Titan Security officers gun down Daina and her associates, allowing Isaac to escape.
The game begins in a hospital on the Sprawl, a densely populated metropolis built on a shard of Titan, one of Saturn’s moons. Isaac Clarke has no memory of the last three years, having just been released by Franco, the protagonist of Dead Space Ignition. However, before he can remove the straitjacket, Franco is killed and transformed into a necromorph, leaving Isaac to escape on his own. He is later contacted by a woman named Daina, who guides him to her location. He is also contacted by another patient, Nolan Stross, claiming he and Isaac can destroy the Marker. Ignoring Stross, Isaac fights his way across the city, making his way to Daina. Upon his arrival, two guards seize Isaac as Daina reveals that she is a Unitologist sent to “recover” Isaac, claiming that he is responsible for building the Marker that is causing the current infestation and that they need him to build more. As they are about to leave, Titan Security officers gun down Daina and her associates, allowing Isaac to escape.
Stross contacts Isaac again and he reluctantly decides to trust Stross, as his only mission now is to destroy the Marker. Stross tells Isaac that the Marker is located in the Government Sector under lockdown. As he makes his way there, Isaac comes across another survivor, Ellie Langford, a CEC officer who eventually joins their mission, deciding that she needs their help to survive. As they progress through the Sprawl, the station’s administrator, Hans Tiedemann, throws several obstacles in their way to stop them from getting to the Marker. Later, Stross’ dementia worsens, causing him to attack Ellie. She survives, and later Isaac is forced to kill Stross in self-defense. As he fights his way to the Marker Isaac experiences visions of Nicole, which become more vivid as she tries to deter him from his task. Eventually he comes to accept that he cannot run away anymore, and that his destiny is to sacrifice his life to stop the Marker, causing the Nicole visions to become friendly.
Dead Space 2 Cheats
Unlock Hardcore Mode
Beat the game under any difficulty.
Unlock Riot Suit
Log into your same EA account through the Dead Space iOS.
Refurbished Plasma Cutter
Have a saved game file from the original Dead Space. The Refurbished Plasma Cutter can be found at the first store.
Unlimited Ammunition Hand Cannon
Successfully complete the game under the Hardcore difficulty setting and upgrade the plasma pistol. The unlimited ammunition and one hit kill hand cannon can be found at the first shop.
Extraction: Expert and Impossible Difficulty
Successfully complete Chapter 10.
Unlock Level Bonuses
Reach the indicated online level to unlock the corresponding bonus:
Level 04: Solid Army Green Suit
Level 07: Line Gun
Level 08: Solid Red Suit
Level 11: Force Gun
Level 13: Solid Black Suit
Level 14: Increased Magazine Size (Plasma Cutter)
Level 16: Solid Olive Suit
Level 17: Seeker Rifle
Level 20: Urban Camo Blue Suit
Level 23: Urban Camo Army Green Suit
Level 25: Increased Magazine Size (Line Gun)
Level 26: Urban Camo Red Suit
Level 28: Javelin Gun
Level 29: Increased Magazine Size (Force Gun)
Level 32: Urban Camo Military
Level 33: Increased Magazine Size (Seeker Rifle)
Level 34: Increased Weapon Damage (Plasma Cutter)
Level 36: Urban Camo Olive Suit
Level 41: Tiger Camo Blue Suit
Level 42: Increased Weapon Damage (Line Gun)
Level 44: Increased Magazine Size (Javelin Gun)
Level 45: Tiger Camo Army Green Suit
Level 46: Increased Weapon Damage (Force Gun)
Level 49: Tiger Camo Red Suit
Level 50: Increased Damage (Seeker Rifle)
Level 52: Tiger Camo Military Suit
Level 56: War Torn Suit
Level 57: Increased Weapon Damage (Javelin Gun)
Level 59: Visceral Games Suit
Chapter 7: Peng’s Treasure
Find the mainframe room where ANTI is located. The circuit room that is to the left (when ANTI’s hologram emitters are behind Isaac) has breakers that also turn blue in addition to green or red. Insert the four breakers in that circuit room to change them to blue. Follow the access tunnel to reach Peng’s Treasure.
Extraction: Change Weapons
Note: This only affects the current level. Exit out to the main menu, then return to the level. You can use the the weapon loadout screen to change weapons. You will resume with the default ammunition for that weapon. Note: You can only select the left special weapon; the other two special weapons are deleted from your inventory.
Cody Murphy
After the train scene in Chapter 3, you will enter some shopping areas. The second area has a fat blue statue. Shoot the head and arms off the statue to earn the achievement or trophy.
Restore Health
Use the shop and the work bench to restore your health. When you wear a suit for the first time your health is refilled.
Purchase the Respec ability for 5,000 credits. Remove the Power Nodes from the Rig and replace them for full health.
Unlimited Credits
Purchase the Supernova or Martial Law downloadable content. Go to the store and purchase the Detonator weapon for free. Fire the mines at a wall, then deactivate them and collect them. Do not reload the Detonator. Sell the mines and Detonator for credits at the store. Buy the Detonator back for free and it will be fully stocked. Repeat the process as many times as desired.
Schematic Locations
Search the indicated locations to find the corresponding schematic:
Chapter 2
- Power Node: Found in the first Power Node locked room you find. You can open the locked door with a Power Node. One can be found on the ground through the door to the left of the closet.
- Hacker Suit: Found at the end of the tram walkway area, near the location you encounter the Fire Sack Necromorphs.
- Stasis Pack: Found on the tracks by where the flaming train passes you for the first time.
Chapter 3
- Pulse Rifle: Once you are out of the train, it is in a corner just behind where the train is hanging.
- Javelin Spears: Found behind the big marker statue towards the windows on the left.
Chapter 4
- Security Suit: Found on the top shelf of the room just past the door that you must slow down to walk through.
Chapter 5
- Ripper: In the multi level room, ride the elevator down, then go to the right side of the room.
- Medium Health Pack: After turning off the gravity and going through the holes in the ceiling, it will be floating in the middle of the room.
- Line Gun Ammo: After crawling through the duct and falling, you will go through a storage room. You will find it behind some shelves on the right side.
- Detonator: Found in a room at the top of the church by the save station.
Chapter 6
- Seeker Rifle: On the path at the start of the chapter, enter the door to the right. You will be on a balcony and the schematic will be on the far right side on the ground.
- Pulse Rounds: When you first meet Ellie, she will unlock the gate. Instead of going through the gate behind her, follow the path around to the right where it is blocked by debris.
- Flame Thrower: After you exit the gym, follow the path and go into the classroom to find the “Kids Gone Crazy” text log. In that same room, there is a smaller room on the right side with blood on the wall. The schematic is on the ground.
Chapter 7
- Ripper Blades: At the start of the chapter when you enter zero gravity, the schematic will be floating at the bottom of the room.
- Force Gun: After you exit the elevator, turn left. You will find some yellow lockers. The schematic in the second locker from the left.
- Contact Beam: The schematic is in the locked closet to the left of the location where you first see the save station on the wall. Use a Power Node to open the closet and get it.
Chapter 8
- Vintage Suit: Found in the first locked door in this chapter.
- Detonator Mines: When you first talk to Ellie and Stross, go to the next room, and take a left. The schematic is beside a body.
- Large Med Pack: Found in the room where you first meet Ellie. It is located past the table in the corner. Use kinesis to move the table.
Chapter 9
- Flame Fuel: When you encounter the laser traps, take a right from where they were located. You will see a few crates lying around. Use kinesis to move them to find the schematic and an audio log.
- Seeker Shells: Found behind the guardian mounted near the exit door of the room where you fight Stalkers and Cysts.
Chapter 10
- Force Energy: When you reach the zero gravity area, go to the lower level to find it on the ground.
Chapter 11
- Contact Energy: In the zero gravity station where you move the lasers to gain access to the shaft that leads inside, look outside from the inside of the shaft to find it.
- Advanced Suit: Enter the locked room opposite of the detonator mines trap. The schematic is inside this room, but you need a Power Node to open this locked room.


 RSS Feed